This help documentation outlines every single step you need to take to operate the SimGrid Server App.
SimGrid ACC App Requirements
You will require:
- Pro Plan
- An approved SimGrid API token
- A Virtual Server (VPS, Dedicated Server or Cloud Instance)
- Examples: AWS, Microsoft Azure, Hetzner, Netcup, GCloud etc
- Not Supported: Game server rental services such as GPortal, Emperor Servers etc
- Operating System Requirements: The Virtual Server must be running Windows
Downloading The SimGrid App
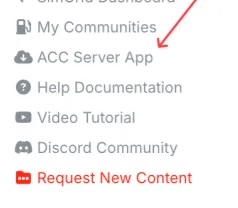
The SimGrid App can be downloaded from your Community Dashboard on SimGrid. You will find it on the left-side of the screen:
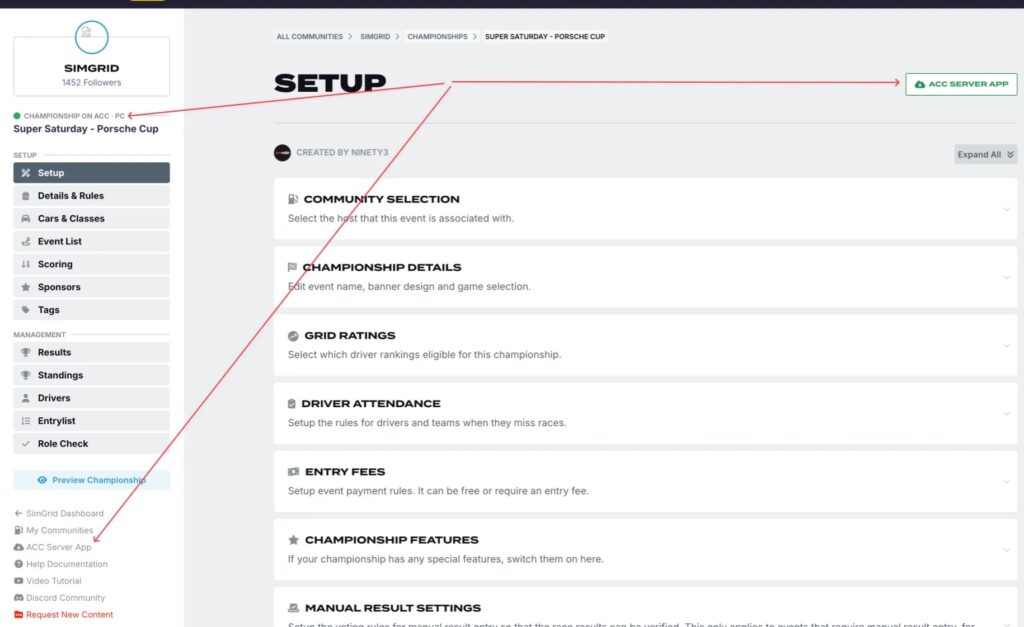
You can also download it from multiple locations on your event setup screen:
Installing The SimGrid App To Your Server
- Download the SimGrid App from SimGrid
- Extract the
simgrid-server.zipfile - Move the extracted SimGrid Server app to a preferred location on your Virtual Server
- Our Recommendation: Create a folder named
SimGrid Server Appon the desktop and place the extracted server app inside.
- Our Recommendation: Create a folder named
Virtual Server Settings
Before using the SimGrid Server App, please ensure that you have changed the Date & Time Settings of your server to (UTC) Coordinated Universal Time.
NOTE: There are multiple options for UTC, so please use the option shown below:

Please also ensure that Set the time automatically is enabled.
Opening The SimGrid App For The First Time
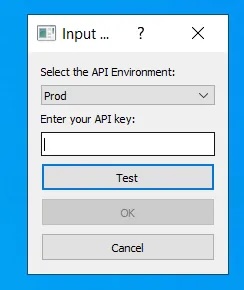
When opening the app for the first time, a window will open, which asks you to enter your API key.
Enter your SimGrid API key and click Test.
The app will verify your API token. If valid, the OK button will become available.
Click OK.
Can’t find your API key?
On SimGrid, from the dropdown menu in the top right, click My Communities. From there, using the tabs on the left side of the page, click Developers and your API token will be shown there.
If your API token is shown as a Token request pending, please get in touch with the admin team at SimGrid for assistance.
App Configuration
After connecting the app to your SimGrid community with the API key the app will open up. By default, it will open on the settings tab. But before using the app we have one more step to complete.
- Click the
Configtab- On this page, we need to tell the SimGrid App where to find the
accServer.exeto use in your events.
- On this page, we need to tell the SimGrid App where to find the
- Click on the
...button and File Explorer will open so you can locate and select theaccServer.exe.- We recommend storing the
accServer.exein an easily accessible location for quick updates whenever a new version is available.
- We recommend storing the
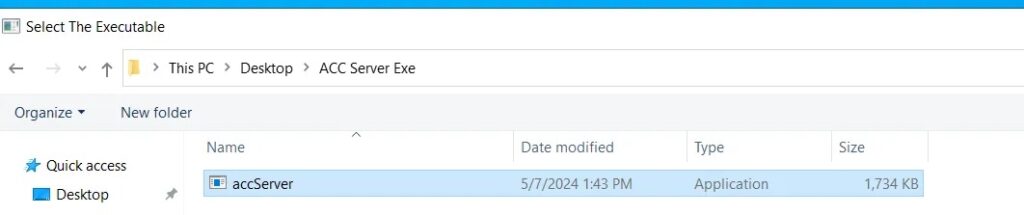
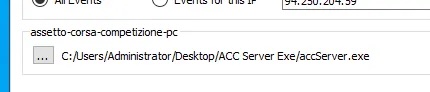
Once you have selected the location of the accServer.exe, click Save on the SimGrid App.
SimGrid App Modes
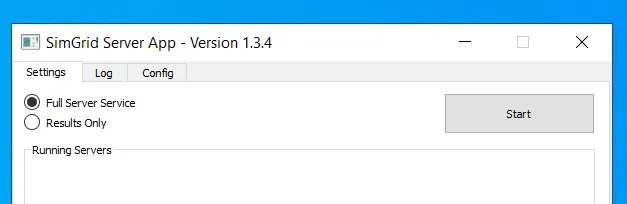
Once you have completed the configuration, go back to the Settings tab. On this tab you will see that the app has two different modes;
- Full Server Service
- Results Only
Full Server Service
The most commonly used mode is Full Server Service. In this mode, the SimGrid App will find events you have scheduled on ACC-PC on your SimGrid Community profile and automatically boot up the server at its scheduled start time, and as results are generated from the sessions it will automatically upload them to SimGrid too.
In order for the SimGrid app to retrieve the events server configuration, you must use the server configuration UI on SimGrid;

| File Name | Required? | Notes |
|---|---|---|
configuration.json | ✅ Yes | It is important you input TCP and UDP ports that are available on your server |
settings.json | ✅ Yes | Essential for event settings |
event.json | ✅ Yes | Defines event structure |
eventrules.json | ✅ Yes | Sets event-specific rules |
assistrules.json | ❌ Optional | Assists configuration |
bop.json | ❌ Optional | Balance of Performance settings |
NOTE: After setting up the JSON files for your event, you will NOT need to download those manually or put them into the usual “cfg” folder. The app will retrieve these files automatically for you.
To start the SimGrid App in Full Server Service mode, click the Start button.
The app will create a championships folder (in the same location you have installed the app) and when the app finds events, it will create them in this folder.
At first, you may not notice anything happening but don’t worry. The app will only create a folder for your event ~10 minutes before its scheduled start time.
A few minutes before the event is scheduled to start, the SimGrid App will retrieve the event files you have set up on SimGrid.
At the event’s scheduled start time, the SimGrid App will then boot up your server and upload results automatically as they get generated.
To summarise; when the app is running in Full Server Service mode, the only steps you have to take as a Community Admin are;
- Configure the server files by using the server configuration UI on SimGrid
- Close down the
accServer.exeonce your event has been completed - Publish the results on SimGrid
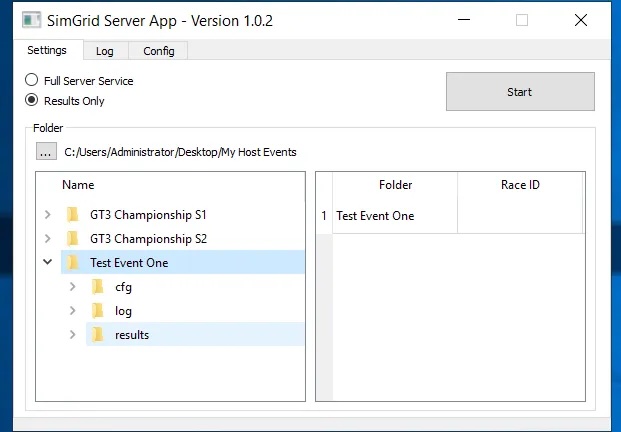
Results Only
In Results Only mode, the SimGrid App will only upload result files for your event. You will have to fully configure the server and boot it up manually. Then, once results are generated, the App will send them to your event.
To use the App in Results Only mode, you must first direct the app to the root folder where all your events and championships are. In this example, that is a folder called My Host Events on the Desktop.

Once you have selected this folder, the window on the left will show you the other folders it has found inside.
In this case, it has located the folders of the three different events. Double-clicking on the event folder will move it to the right-side window and will allow you to enter the applicable Race ID.
NOTE: Ensure you select the main event folder, not the results folder.
The Race ID is the last 5 digits found in the URL of the results page where you need the results to go. https://www.thesimgrid.com/admin/championships/[EVENT ID]/races/[RACE ID]/results
Input the relevant Race ID into the field and click Start to start the app in Results Only mode.
NOTE: If the results do not upload, double-check that the Race ID in the app matches the Race ID in the event page URL.
Updating The SimGrid Server App
The SimGrid Server App will show you its version at the top of the window. In the screenshots used throughout this article, the app version is 1.3.1.
Whenever we post updates to the SimGrid Server App, these will be communicated in the SimGrid Discord with a notice to all the Community Admins and the notice will inform you of the latest version number.
To update your SimGrid Server App on your Virtual Server;
- Close the app by clicking the
Xin the top-right corner - Open the folder where you installed the app
- Delete the old app file
- Place the latest version of the app on your Virtual Server